Thursday, February 25, 2010

Fish Recipes for Lent


For my contribution to Food Renegade's Fight Back Friday this week, I am sharing a few of our family's favorite fish/seafood recipes. Our family is following tradition in observing the season of Lent by foregoing meat on Fridays, instead eating only fish. To keep it interesting, I've began experimenting with different methods of preparation and recipes. Fish is not at all difficult to prepare and is one of the most nutrient-dense foods one can consume. A few of fish's benefits:


*promotes excellent growth and bone structure


*rich source of iodine and zinc, minerals that are a little difficult to get in the average person's diet.


*deep-sea oily fish (tuna, mackerel, salmon, etc...) are particularly high in omega-3's, crucial for vibrant, healthy skin and hair, as well as a proven method of treating depression, especially postpartum depression.


*good source of fat soluble vitamins A and D.


Here are some of my favorite recipes:


Terriyaki Salmon


4 salmon fillets, boned and skinned


1 tbsp. fresh grated ginger


3 garlic cloves, smashed


1 tbsp. toasted sesame oil


1 tbsp. rice vinegar


1 tbsp. raw honey


1/2 c. naturally fermented soy sauce


Place salmon on a broiler pan; in a glass jar with a lid, combine the rest of the ingredients. Shake vigorously. Baste each salmon fillet with the sauce; place in oven and broil under very low heat for 6-8 minutes, basting frequently. Drizzle a bit of the terriyaki sauce over the salmon before serving.


Salmon Cakes with Lemon-Caper Mayonaise


1 can salmon, drained and flaked with a fork


1 tsp. dried parsley


1 tsp. each dried oregano, summer savory and basil


1 tbsp. mayonaise


1 clove garlic, minced


1 small onion, minced


2 tbsp. bread crumbs


coconut oil for frying


Combine all ingredients in a large mixing bowl; mix until well-combined. Form into medium-size patties and fry in coconut oil for 5 minutes on each side.


Lemon-Caper Mayo

1 c. mayonaise

juice of 1 small lemon

1/2 tbsp. capers


Combine all ingredients.


You can also check out my recipe for Shrimp Caprese here.

Wednesday, February 24, 2010

Frugal, Earth-Friendly Tip--Repurposing Glass Jars


By now, you are probably aware of the dangers associated with using plastic containers for storing food or cups/bottles for drinking beverages. Plastics are known to leach harmful chemicals into our bodies, especially after being heated, making them particularly unsafe for food storage/serving. I am planning a more extensive post (or two!) on plastics in April, Earth Month, but I'll give you a quick run-down of some of the pitfalls of using plastics:


*increased hormone production in females, increased female hormones in males.

*altered immune response

*increase in certain cancers, especially those of the prostate and breast.

*increase in birth defects

*increase in behaviorial disorders, such as hyperactivity and aggression


And those are just a few!


Of course, some plastics are considered more safe than others. You can read more about that here in the Smart Plastics Guide, a ultra-informative resource on plastics usage. However, I am making it a goal to have pretty much all but eliminated plastic food storage from our home by the end of summer! One step I have taken in this direction is the utilization of various glass jars for food storage. I use wide-mouth canning jars to store just about anything in my pantry--popcorn, dry beans, rice, you name it! I plan on purchasing some very large glass canning jars to store flour, as I am regretably still storing it in a big plastic bin! :( Another good option for flour storage would be ceramic crocks. I use glass canning jars for cold storage, too, anything from leftovers to homeade stocks to water kefir beverages. I love using all the Santa Cruz glass juice bottles I've saved over the past year to store fresh fruit juice from my juicer! I find my glass jars the best option for all the ferments I may have brewing at any time in the kitchen--sourdough starters, fresh ginger ale, sauerkraut, etc... As you can see, they are well-used in my kitchen! I also repurpose any glass jars from ready-made products I have bought, such as jams, honey or coffee, as they make excellent food storage containers for smaller quantities.


Are you making the switch from plastic to glass in your kitchen? I'd love to hear your ideas!

Monday, February 22, 2010

Simple, Nourishing Breakfast--Baked Oatmeal and Coconut Smoothie


Our family really enjoys oatmeal! Both tasty and nutritious (especially when served up with some raw cream, butter, real maple syrup and a dash of cinnamon!), oatmeal is a wonderfully frugal yet filling breakfast option.

Several months ago, I began to notice quite a few recipes on various blogs for baked oatmeal. Intrigued, I decided to give it a try. I followed a very basic recipe, adjusting the ingredients to our likings, and I must say that we were quite pleased with the results. Our baked oatmeal was something like a giant, very soft oatmeal raisin cookie! Like a regular bowl of breakfast oats, it does require a bit of preparation the night before, but requires little hands-on time to assemble in the morning, making it a time-saving breakfast option. We like to serve ours with fresh butter and real maple syrup or raw honey.

We have also been experimenting with some new smoothie recipes, and recently I paired this recipe for coconut smoothies with our baked oatmeal breakfast. Coconut milk and coconut oil are extremely beneficial to our diets, containing high ammounts of lauric acid, and according to Sally Fallon in her book Nourishing Traditions is "an essential saturated fatty acid that enhances the immune system and protects us against viruses, yeasts, parasites and other pathogens in the gut." This coconut smoothie is an easy, tasy way to get more coconut products into your diet.


Coconut Smoothie

2 tbsp. coconut oil

1 1/2 c. whole coconut milk (stay away from the ones labled "lite")

1 banana, cut into chunks

1/4 c. raw honey

1/2 c. plain or vanilla whole-milk or cream-top yogurt

1 tsp. pure vanilla extract (you can omit this if you are using vanilla yogurt)

2 cubes ice, optional, but makes for a nice, cold, almost pina colada-like consistency!


Blend all ingredients in a blender until ice is completely crushed and blended with the other ingredients. Serve immediately.


Baked Oatmeal

Oatmeal is particularly high in phytates, so this recipe calls for a soaking step--plan ahead! However, I find that soaking my grain products makes for an easier preparation in the morning, as half the work is already done! If you are new to soaking, you can find some excelent resources listed at the bottom of this post. I highly suggest you take some time to read about this important step to preparing healthier whole-grains and legumes.


6 c. rolled oats

1 c. melted butter or coconut oil (personal trial and error has proven coconut oil to make a more moist product, but either is fine!)

2 c. yogurt or buttermilk

1 c. pure maple syrup or raw honey


Mix all ingredients until moistened in a large mixing bowl; cover with a clean dishtowel and let soak overnight, 12 hours or more. When ready to prepare, add:


4 eggs, lightly beaten

1 tsp. cinnamon

2 tsp. baking powder

1/2 tsp. sea salt

1/2 c. raisins

1 tsp. pure vanilla extract


Combine all ingredients until moistened; transfer to a greased 9 x 13 baking dish and bake at 350 degrees for about 30 minutes or until top starts to crack, a sure sign it's finished.


There you have it--a quick, nourishing start to your family's day!


Further Resources on Soaking


The Value of Soaking Your Whole Grains--Lindsay delivers a very thourough post on the health benefits and how-to's of soaking, including more resources at the bottom of her post.

Friday, February 19, 2010

Weekend Reading--Link Love!


Well, I've never posted a link love post before, but I have way to much work to procuce a regular post today, so I thought I'd share these great articles I've enjoyed over the week. Happy reading!

What About Some Time to Myself?--this soul-searching post by Stephanie at A High and Noble Calling blog should perhaps be required reading for all moms! If you do one thing this weekend, READ THIS!

Planning to Make Real Food Preparation Happen--Stephanie at Keeper of the Home blog has once again written an informative, detailed post on organization, this time concerning the preparations needed for ensuring your real food meals make it to the table! Preparing real, nourishing foods requires quite a bit of planning in advance, and Stephanie shares the simple yet effective system that works for her (and now me!).

Food Renegade's Fight Back Fridays--one of my favorite websites, Food Renegade, hosts this weekly blog carnival devoted to real, traditional food. Check it out--maybe you'll find a new recipe or two to try over the weekend!


"Green" Your Swiffer!--I love Emily's idea for repurposing cloth diapers into washable, reusable Swiffer pads!


Have a great weekend!

Sunday, February 14, 2010

Our New Juicer! (plus some recipes!)


Ever since our family has been making a change to eating a more traditional/whole foods diet, one of the biggest items on my kitchen gadget wishlist has been a juicer. We had all but given up on store-bought juices, due to artificial ingredients, dyes and high-fructose corn syrup, but save for the occassional bottle of Naked or Santa Cruz juice (expensive...yikes!), we discovered one truth about the Vega family...we really, really like juice! With no juice in our home, Henry and I both began to crave sodas, something we had not done for quite some time! So, after some careful consideration, we decided it would be a good investment to buy a good-quality juicer. We decided on the Juiceman Hero Electric Juicer from Black and Decker. The Juiceman is very basic, not too large and super-efficient! It has 2 speeds, one for softer fruits and veggies, and another for hard ones, like carrots. I particularly like the ease of disassembly for cleaning--everything disattaches from the main unit so you don't have to try to clean parts while avoiding getting the motor wet!


An added bonus to this juicer is the compartment that collects the pulp from the fruits and veggies being used. I add this pulp to a basic whole- grain muffin recipe with flavorful, moist results! After making a quart of carrot-orange juice the other morning, I used the pulp to create the recipe for Sunshine Muffins, a surprisingly big hit with little Henry.


Sunshine Muffins


*Note: a soaking step for the whole-wheat flour is reccomended, although I made these on the spur of the moment, so I skipped it.


2 c. whole-wheat pastry flour


1 c. softened butter


1 egg


1/2 c. maple syrup or honey


1 tsp. vanilla extract


2 tsp. baking powder


reserved orange and carrot pulp


1 c. milk


Cream butter, pulps, egg and sweetener in a mixing bowl; add baking powder and vanilla, creaming until smooth. In a large mixing bowl, combine soft ingredients with the flour and milk, a bit at a time, stirring until well-moistened. Fill greased muffin tin cups 3/4 of the way full; bake at 350 degrees for about 20 minutes, or until golden brown. Makes one dozen muffins.


Tropical Delight Juice


2 c. chunked fresh pineapple


2 mangos, quartered


2 oranges, peeled and quartered


1 c. coconut milk


Run first three ingredients through your juicer; add coconut milk, shake and serve.


Lemonade


4 lemons, peeled and halved


1 c. water


1 c. rapadura


Juice the lemons. In a saucepan, combine rapadura and water; bring to a boil, then recuce heat, stirring constantly until rapadura is dissolved, forming a simple syrup. Combine syrup with lemon juice and 2 cups of water or sparkling water for a lemonade spritzer.

Friday, February 12, 2010

Simple Beef Paprikash with Spaetzle


Beef Paprikash is a simple recipe I came up with to use up lefover roast. I really enjoyed eating the traditional Chicken Paprikash in a Hungarian restraunt in Florida several years ago, but was wondering if it could be made with beef, as our family prefers beef to chicken. I experimented a couple of times before coming up with this recipe, which is actually quite good. I serve the Paprikash with this recipe for spaetzle, a Hungarian-style dumpling, simply made of egg and flour.


Beef Paprikash


2 c. leftover pot roast, slightly shredded

1/2 c. beef broth

2 tbsp. butter

1 tbsp. olive oil

1/2 c. sliced fresh mushrooms

4 tbsp paprika

1/2 c. flour, preferably whole-wheat, but sometimes I substitute half white, half wheat

1 tsp. salt

1 1/2 c. whole milk

1 clove garlic, minced

1 small onion, finely chopped


In a saucepan, sautee onion, mushrooms and garlic in butter and olive oil about 2 minutes; add flour, stirring constantly, to form a roux. Add the milk, bring to a boil and immediately reduce heat, stirring until well-thickened. Add broth, paprika and salt; mix well. Remove from heat and add the roast; let sit a few minutes to heat through. Serve beef mixture on top of spaetzle.


*Note: traditionally, Paprikash is made with sour cream, so you may prefer to make it this way. (our family just doesn't like sour cream...none of us!) If you want to use the sour cream, simply omit the roux step and the milk, and just add the sour cream to the broth and the sauteed garlic onion and mushrooms; add the spices.

Wednesday, February 10, 2010

Yummy Valentine's Day Treats!


This year, the children and I are making special treats for Daddy for Valentine's Day! Our plans are to surprise him with a breakfast of crepes covered in whipped cream and strawberries, bacon and fresh squeezed juice from our new juicer ( a tax time treat!). We are also making a yummy but healthy fudge following Lindsay's recipe, as well as this delicious recipe for cinnamon popcorn. We will celebrate Valentine's Day with the children at an all-congregation dinner at our church before Sunday evening services, then, if we are blessed with a babysitter, celebrate alone on Monday with a candlelit dinner or at a nice restraunt, haven't decided yet!

Happy Valentine's Day to the best husband ever! You are a great partner, a caring father and a wonderful provider for our family. I love you so much!

Saturday, February 6, 2010

Crockpot Refried Beans


Our family loves refried beans. Frugal and nourishing, refried beans can be used in a variety of dishes. Some of our favorites include in bean and rice tacos, beef and bean or just plain bean burritos, tostadas, as a side to enchilladas or in taco salad. Refried beans taste great when paired with salsa, guacamole, cheese...the list goes on and on!

I love to use beans to stretch meals, often times replacing half of the meat called for in a recipe with beans. They are a wonderful source of both protein and fiber, and at about $1.50/lb., a far more frugal option than meat!

I prefer to make my refried beans, simply because they require a lot of cooking time to make them super-soft, and I don't feel comfortable simmering on the stove that long! This way, I can just soak the beans all night, throw them in the crockpot in the morning and they're done in time for dinner. I find the flavor is a lot better with this method as well.


Crockpot Refried Beans


Soaking Step (optional): Place beans in a large glass jar with lid, or a large bowl would work as well--just cover with a towel. Add enough water to cover the beans, plus 1 inch. Add an acid medium to help release phytates in the beans. I find that apple cider vinegar or lemon juice work well with beans. Cover and leave to soak overnight or at least 10 hours. In the morning, drain and rinse before using.


Place 1 lb. dried (preferably soaked) pinto beans in crockpot along with about 6 cups of water; cover with lid and allow to cook on high about 4 hours; check to see if additional water is needed. Reduce heat to low and allow to simmer another 6 hours. Remove and drain liquid; return beans to crockpot. Cover just above the beans with your choice of stock, chicken or beef. (I prefer beef, just for the rich, deep flavor.) Simmer on low, about 3 hours, or until beans mash very easily with a fork. Mash beans, in the crock, to the consistency of your choice. Season to your taste. I like to season them very simply with salt and a clove or two of minced garlic.


I freeze any leftovers in 1-cup portions in freezer bags.

Wednesday, February 3, 2010

Naturally Treating Three Childhood Ailments--Cradle Cap, Thrush and Teething


Wow, what an experience it has been to have two children so close in age! Recently, this has presented a new set of challenges, as Henry has decided to cut about 7 teeth at once, including 2 molars (YIKES!), and Ryan has been plagued with ongoing bouts of cradle cap and thrush.

Of course, I had been through teething before with Brett (easy as pie with him, I might add) and of course Henry had already cut some teeth, but NOTHING could have prepared me for this go-round! My poor sweet baby had been reduded to a whinning, screaming, irritable, wakeful mess! Unable to sleep more than two hours at a time, my little one was cranky and in pain all day and night. I was giving him Tylenol to help relieve the pain, but it just didn't seem to be working....then, enter Hylannd's Teething tablets! I can not say enough good things about this wonderful product! The teething tablets are an all-natural, homeopathic remedy readily available in most drug stores. I like that the ingredients are simple as well as familiar (nothing I can't pronounce!) and found in nature. Here's the breakdown:


Calcium--supports dentition

Chamomille-calms irritability

Coffea Cruda--relieves wakefulness

Belladonna--relieves redness and inflammation


Since these tablets do seem to sedate Henry a bit, we have implemented a schedule in which he takes 3 tabs (the full dosage) 30 minutes prior to naptime and bedtime and only 2 tabs (if needed) 3 hours apart. Most of the time, he just gets by on a dose of Tylenol between nap and bedtime.


While Henry has been battling with teething, Baby Ryan has been dealing with his own ailments, a nasty and persistent thrush, as well as some pretty serious cradle cap! After our pediatrician diagnosed Ryan's thrush, she sent us home with the standard treatment, an oral rinse of an anti-fungal called Nystatin. Upon reading the presription information handout from the pharmacy, I discovered that one side effect of this medication is nausea/stomach upset. I noticed my sweet, happy little Ry-Ry was a bit fussy, unusual for him, but I just assumed he was tired. I continued with the medication, but with each dose, he became more and more irritable, unable to sleep and crying uncontrolably. I decided to research other, more natural methods of treating thrush. I am now treating him with a combination of Venetian violet, a bactericide/anti-fungal, and powdered probiotics mixed with a bit of water to form a paste and applied directly to the tounge. Using the VV is a bit more complicated, as preparations must be taken to prevent staining (clothes, skin, you name it!). I rub coconut oil on Ry's lips and chin before applying a 1/2 to 1/2 solution of VV and distilled water to the tounge/mouth with a clean cotton swab. It needs to sit about 15 minutes before nursing. I am happy to report that the thrush is indeed clearing up!

As for the cradle cap, I've been massaging coconut oil onto Ryan's scalp 30 min prior to his bath, letting it sit, then washing it out with Burt' Bees Grapefruit shampoo dilluted with regular baby shampoo, drying with a towel and then massaging with a super-soft toothbrush to loosen the "scales". Works great!


Monday, February 1, 2010

Goals for 2010


In the midst of all the business here in the Vega home, I have completed a list of goals for our family to accomplish this year. I have been using some very helpful organizational tools from listplanit to help me get organized again, something that flew out the window when Ryan was born! God has definitely been using the experience of being mommy to two babies in less that a year to refine and humble me. I believe I was making a clean, organized, near-perfect home an idol in my life....I've had to let go of a lot of my expectations to simply focus on meeting the needs of my very young children, as well as the other members of our family, myself included.

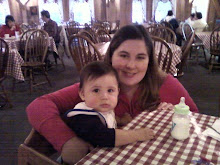
However, God's mercies are new with each new day, and I must say things are getting a LOT easier now that Ryan is almost three months old. I am feeling much more rested and energized now that he is sleeping for longer stretches of time. We have also found a few other helpful tools in making our days a bit smoother, including the use of Hylannd's Teething Tablets for Henry! I can not say enough good things about this product. My poor, sweet little man has been fussy, drooling, restless, wakeful during the night and at times sobbing inconsolably--these little wonder tablets have really saved the day for us! I highly suggest them, as they are an all-natural homeopathic remedy that really work to eliminate teething pain. They seem to have a mild sedative effect, which makes them great around nap or bedtime, especially if your little teether has trouble settling down or staying asleep due to pain.

One other tool that has been really helpful to us has been the implementation of a morning routine. I must confess that I am not by nature much of a morning person, but I do find that a structured routine gets the day off to a smooth start for not just myself, but my children! I find that if I have breakfast ready when they wake up, there is less whining during the day. Children find solace in structure. This also allows me to get my thoughts in order and get my heart and mind where they need to be to deal with the challenges of each day. It's so nice to have uninterrupted time to prepare for breakfast, wash dishes, start a load of laundry, etc... before the family is awake. This frees up more interpersonal time for us to enjoy together.

I have also been working on my daily routine, working to make it a bit more streamlined and thus, easier on me! Why was I trying to bathe two babies and myself (and when Brett is here, although he's pretty much bathing himself, I still must stand by, so there's an extra bath!) in the evening when Henry is at work? It's very time consuming, what with trying to keep one entertained while I bathe and dress the other...there's a stroller and a Baby Einstein movie involved, a binky, a bottle....the list goes on and on :). Why was I making it so complicated for myself and so miserable for my children, simply because I think kids need a bath before bed? I had to (once again) let go of an unrealistic expectation...that simply does not work with our routine! My husband works in the evening, therefore some of our routine had to be reworked to be more practical for us! I decided to try bathing the children in the morning after breakfast, when my husband was free to entertain the other and both while I bathed, and guess what? The world did not come to an end, and the children were actually happier and more calm throughout the day. We had more time to just simply play together in the evening as well!


2010 Goals


1. Develop a better bedtime routine for Henry--bed by 8:30 (it's currently about 10...yikes!), limit bottles during the night, sleep alone the entire night in his bed. Sleep in his own bedroom by the end of the year.


2. Break Henry of the bottle and replace with sippy cup. Begin to teach him how to eat with a spoon. Work on table manners :)


3. Break Henry of pacifier. This is going to be a hard one! My original plan was to start this in the summer, but as long as we make it by the end of the year, we're good!!!


4. Begin a reading time with Henry. We just have not been reading enough to him.


5. Loose weight! Develop an exercise routine that we can enjoy as a family. Hubby and I both will benefit from this one :)


6. Reintroduce date night. This is going to be difficult, as my mother is the only person I trust to care for my children when we go out, but we need the time to relax and reconnect. Mother is getting ready to begin kidney dialysis, however, so I am not sure she will have the energy to care for the children, even though she would love to. Time to look for a babysitter, I guess!


7. Become more social! This seems to be really hard for us. We need to start spending time with other people on a regular basis. There are several couples that have expressed interest in spending time with us or have invited us to activities, but sadly, with Henry's work schedule, it's been almost impossible. We must work on this!


Those are some of our main goals for the year. How are you implementing goal-keeping in your family this year?